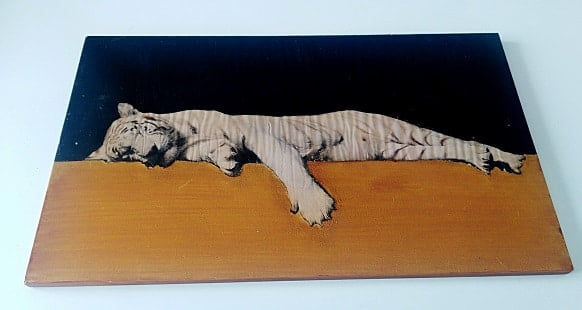
You will discover the necessary steps to create this decorative artwork. It is made by printing an image of a white lion on wood (medium panel). You will also see how to create a 3D optical illusion and how to transfer an image onto wood.
Printing photos on wood is a magical technique that allows us to give a natural look to our keepsake photos, to images of nature, and to the animals that fascinate us.
Key Points:
- Printing on wood provides a unique, organic aesthetic to photographs.
- The wood material lends a natural, rustic quality that complements many types of photographic subjects.
- This printing process enables you to preserve special memories in a distinctive, handcrafted way.
- Transforming flat photos into wood-based art pieces creates visually striking and one-of-a-kind home decor or gifts.
By embracing this magical printing technique, you can elevate your favorite photographs into beautiful, natural-looking pieces that captivate the senses.
Also read: Designing an Epoxy River dining table: Expert advice (DIY)
What is Wood Printing?
Wood photo printing is a technique that allows you to transfer an image onto a wooden surface, using either UV ink or special adhesives. This method produces an original and natural-looking result that enhances the colors and contrasts of the photograph. It can be done on a variety of formats and thicknesses, depending on the desired outcome.
👉 There are also two types of finishes: a full coverage print that coats the entire wood surface, or a transparent print that allows the wood grain to show through.
Key Benefits of Wood Printing:
- Organic, Natural Aesthetic: The wood substrate adds a unique and authentic feel to the image, highlighting the photo’s colors and contrast.
- Versatile Formats: Images can be printed on wooden panels of different sizes and thicknesses to achieve the preferred look.
- Finish Options:
- Full Coverage: The print completely covers the wood surface.
- Transparent: The natural wood grain remains partially visible.
In summary, wood photo printing is a creative technique that allows you to transfer images directly onto a wooden medium, resulting in an original and natural-looking piece that can be customized to your specifications.
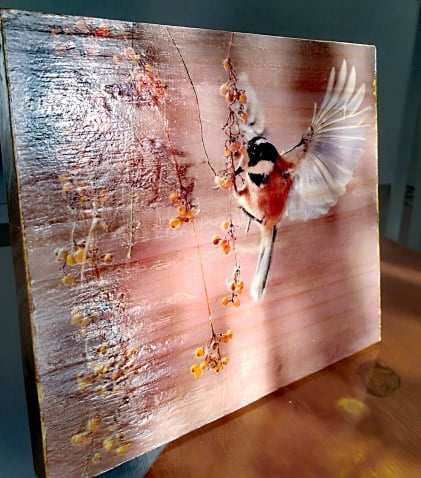
Wood Photo Printing for Personalized, Cozy Wall Decor
Wood photo printing is ideal for creating a personalized and warm wall decor, in a Scandinavian or rustic style. It can also make for an original and lasting gift that immortalizes a precious memory.
Key Benefits of Wood-Printed Wall Art:
- Personalized Aesthetic: Transferring your own photos onto wood panels results in a one-of-a-kind, customized piece of wall art.
- Cozy, Organic Feel: The natural wood grain and texture lend a warm, inviting atmosphere to the displayed imagery.
- Versatile Styling: Wood-printed art complements a variety of interior design styles, from Scandinavian to farmhouse-inspired.
- Lasting Keepsake: This printing technique produces a durable, high-quality piece that preserves special memories for years to come.
Whether decorating your own home or gifting to a loved one, wood photo printing allows you to transform cherished images into a personalized and timeless wall accent that brings natural beauty and heartfelt sentimentality to any space.
What is an Optical Illusion 3d?
An optical illusion 3d is a visual perception that does not match objective reality. It can be caused by physical factors such as light, color, contrast or movement, as well as psychological factors like attention, memory or expectations.
Why are Optical Illusions Interesting?
- Studying the Visual System: Optical illusions allow researchers to study the functioning of the human visual system and the mechanisms of cognition.
- Artistic and Entertaining Value: Optical illusions can be used creatively to generate surprising and amusing visual effects.
Main Types of Optical Illusions:
- Illusions based on physical factors (light, color, contrast, movement, etc.)
- Illusions based on psychological factors (attention, memory, expectations, etc.)
Optical illusions 3d are fascinating visual phenomena that provide unique insights into how our brain interprets and processes visual information.
Also read: 8 DIY decor ideas, original gifts, printing on wood / epoxy
DIY video: printing an image of a white lion on wood (medium panel)
Tutorial Text: printing on wood and how to make an optical illusion 3d
Materials Needed:
- Wood Panel: A wood panel sized 16×25 inches or 30×40 inches if you are printing A3 photos
- Wood Glue Varnish: Used to transfer the printed image onto the wood
- Glossy Varnish: To seal and protect the finished piece
- 280 Grit Sandpaper: To smooth the wood surface
- Water Bowl: For dampening the wood panel
- Fine Detail Brush: For applying the glue varnish
- Image or Photo: e.g. a white lion image
Key Steps:
- Prepare the Wood Panel: Sand the wood surface smooth with the 280 grit sandpaper.
- Dampen the Wood: Lightly dampen the wood panel with water using the bowl.
- Apply the Glue Varnish: Carefully brush the glue varnish onto the damp wood.
- Transfer the Image: Place the printed image face-down onto the varnished wood, applying gentle pressure.
- Allow to Dry: Let the transferred image fully dry on the wood panel.
- Apply the Glossy Varnish: Brush on a protective layer of glossy varnish over the entire surface.
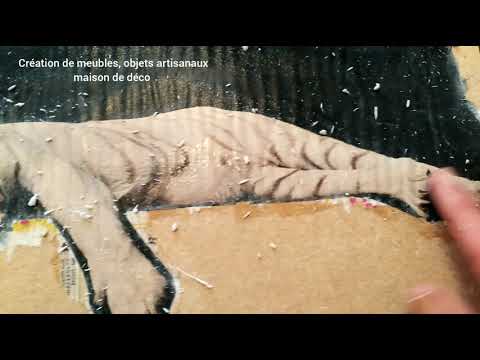
- Create the Optical Illusion: Use specialized techniques to generate a 3D visual effect on the wood.
How to choose an image to create an optical illusion?
- Do Your Research: Spend time searching the internet for examples of optical illusion artwork and imagery. This can help inspire and guide your own creative process.
- Trust Your Instincts: As you browse potential images, go with the ones that immediately capture your imagination and seem like they could lend themselves well to an optical effect.
- Look for Specific Qualities: Effective illusion images often have strong contrasts, geometric patterns, ambiguous shapes, or other visual elements that can be manipulated to create a 3D or distorted appearance.
- Use Royalty-Free Images: Make sure to only use images that are free of copyright restrictions so you can legally reproduce them on your wood panel.
The key is to carefully select an image that has the right visual “ingredients” to allow you to craft an engaging optical illusion. By doing your research, trusting your creative instincts, and using copyright-free sources, you’ll be well on your way to producing a captivating wood-printed artwork.
Also read: Revamp Your Interior with the 2024 Home Decor Trends
How to make a print on wood?

Printing images on wood is an easy technique to achieve, but it does require concentration and minimal knowledge. I’ll give you the main points:
Key Steps:
- Cut the Wooden Board: Cut your board to the desired measurements.
- Sand the Surface: Sand the wooden board well to ensure a smooth finish.
- Apply the Glue Varnish: Apply a thin layer of glue varnish to the board.
- Adhere the Photo: Apply another layer of the glue varnish directly on the face of the photo.
- Position the Photo: Carefully place the photo face-down onto the varnished board.
- Secure the Photo: Gently press the photo, using a ruler or hard plastic card to remove any air bubbles between the photo and the board.
- Let it Dry: Allow the assembly to fully dry, which can take up to a full day.
- Remove the Paper: Using water, gently scrape away the paper, removing any residue remaining on the image.
- Apply the Glossy Varnish: Finally, brush on a glossy varnish to the photo transferred onto the wood, to protect and add shine to the finished piece.
Tips for successful printing on wood
Choose the Right Wood: Select a smooth, clean wood panel or board as your canvas. Avoid uneven or heavily-grained surfaces.
Prepare the Surface: Thoroughly sand the wood to create a flawless base for the image transfer. Wipe away any dust.
Use Quality Glue Varnish: Invest in a high-quality glue varnish designed specifically for image transfers. This will ensure a strong bond.
Apply Evenly: Spread the glue varnish in thin, even coats on both the wood and the of the photo. Avoid thick, uneven application.
Smooth Out Bubbles: Carefully press out any air bubbles or creases between the photo and wood using a squeegee or hard card. This prevents wrinkles.
Protect the Edges: Seal the edges of the wood with the glue varnish to prevent peeling or lifting of the image.
Allow Proper Drying Time: Follow the manufacturer’s recommended drying time, usually 24 hours, before proceeding to the next steps.
Gently Remove Paper: Slowly and carefully peel away the paper backing, using water to help dissolve the fibers.
Finish with Sealant: Apply a protective layer of clear, glossy varnish over the final image to preserve and enhance the wood-printed look.
By paying attention to these key tips, you can ensure a professional, high-quality wood print every time.
👉 For more details, I invite you to watch my video on YouTube: how to print an image on wood from A to Z for beginners 🙂
Also read: Epoxy Resin: How to Polish and Color It Like a Pro
Summary:
By following these steps and tips, you can transform a simple wood panel into a captivating wall decoration featuring both a printed image and an engaging optical illusion 3d effect.


