Discover the Easy Technique of Laser Image Transfer on Wood
Wood decor is making a big comeback in modern homes. Why not bring your favorite backyard bird photos to life on a custom wooden piece? In this article, we’ll reveal the simple and quick method to transfer a laser image of your beloved european goldfinch onto a wood panel.
The Advantages of Image Transfer on Wood
Rather than just framing a regular photo, transferring it onto wood allows you to create a truly unique and personalized decorative piece. Here are some of the main benefits of this technique:
- Authentic, Handmade Result: Compared to a standard print, the wood transfer gives an authentic, handcrafted look to your decor.
- Highlights the Details: The natural wood texture helps to accentuate the delicate feathers and intricate details of your beautiful goldfinch photo.
- Durable Decor Piece: Thanks to the application of multiple varnish layers, your wood transfer will become a long-lasting wall or tabletop decoration.
- Endless Personalization: Let your creativity shine by choosing your favorite bird photos, landscapes, or patterns to create a one-of-a-kind decoration.
Materials Needed for the Transfer
Before getting started, make sure you have the following supplies on hand:
- A smooth, thin (3-5 mm) wood panel
- A laser-printed image of your favorite goldfinch
- Wood glue (or white PVA glue)
- Flat paint brushes for glue application
- A clamp or press to hold the panel in place
- Sandpaper in various grits (medium 120-150, fine 180-220)
- Varnish or clear acrylic sealer (matte or glossy)
Wood Decor: Transfer Your European Goldfinch Photo to Wood (Step-by-Step)
Carefully follow these steps to achieve a successful image transfer:
1. Prepare Your Laser-Printed Image
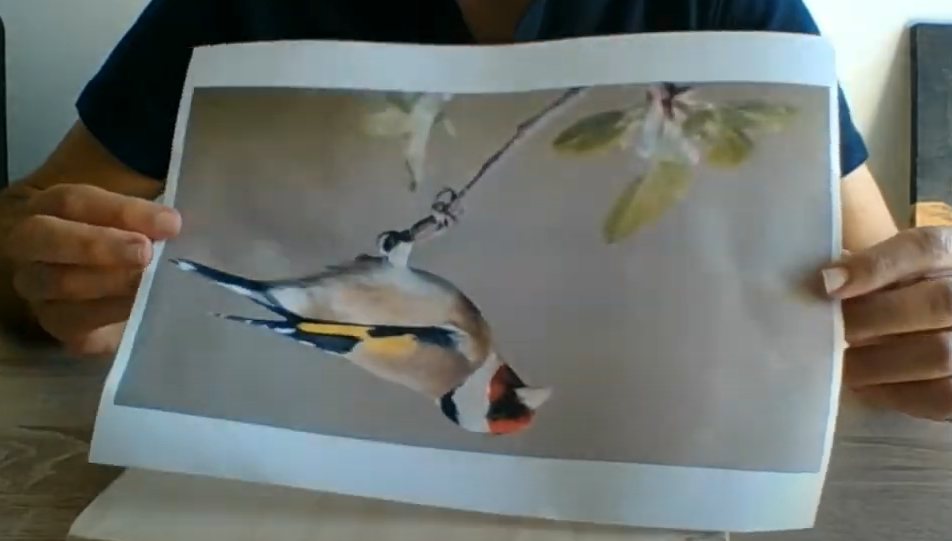
Start by printing your favorite goldfinch photo on a laser printer. Ensure the image is of good quality and has high contrast for optimal results.
👉 Expert Tip: Do a test print on regular paper to check the framing and dimensions before transferring to the wood.
2. Apply the Wood Glue
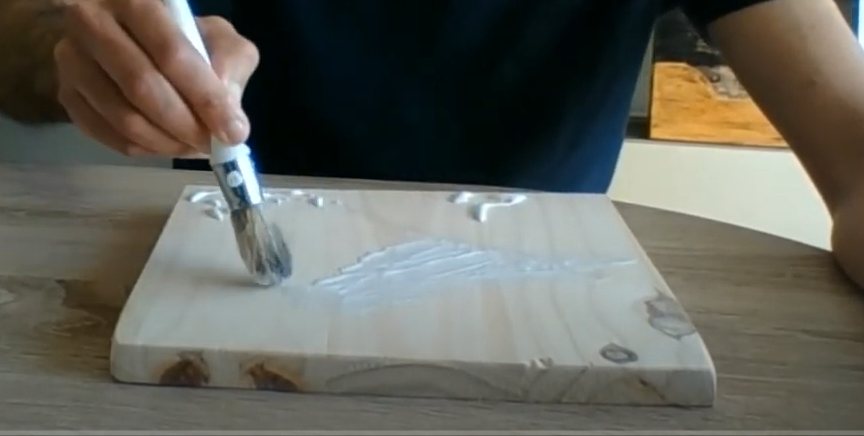
Place your smooth wood panel on a clean work surface. Using a flat brush, apply a thin, even layer of wood glue over the entire area where you want to transfer the image.
Handy Tip: Opt for a white PVA glue, as it dries faster than traditional wood glues.
3. Position and Press the Image
Carefully align your laser-printed image face-down onto the glued wood surface. Firmly press across the entire surface to eliminate air bubbles and ensure perfect contact between the paper and the wood.
👉 Use a rolling pin or plastic scraper to gently smooth the image and chase out any remaining air bubbles.
4. Allow to Fully Dry
Let the glue dry for at least 6 hours, or even overnight, for optimal results. During this time, the glue will penetrate the paper and firmly secure the image to the wood.
Handy Tip: Place a light weight (book, small object) on top of the image to maintain constant pressure as it dries.
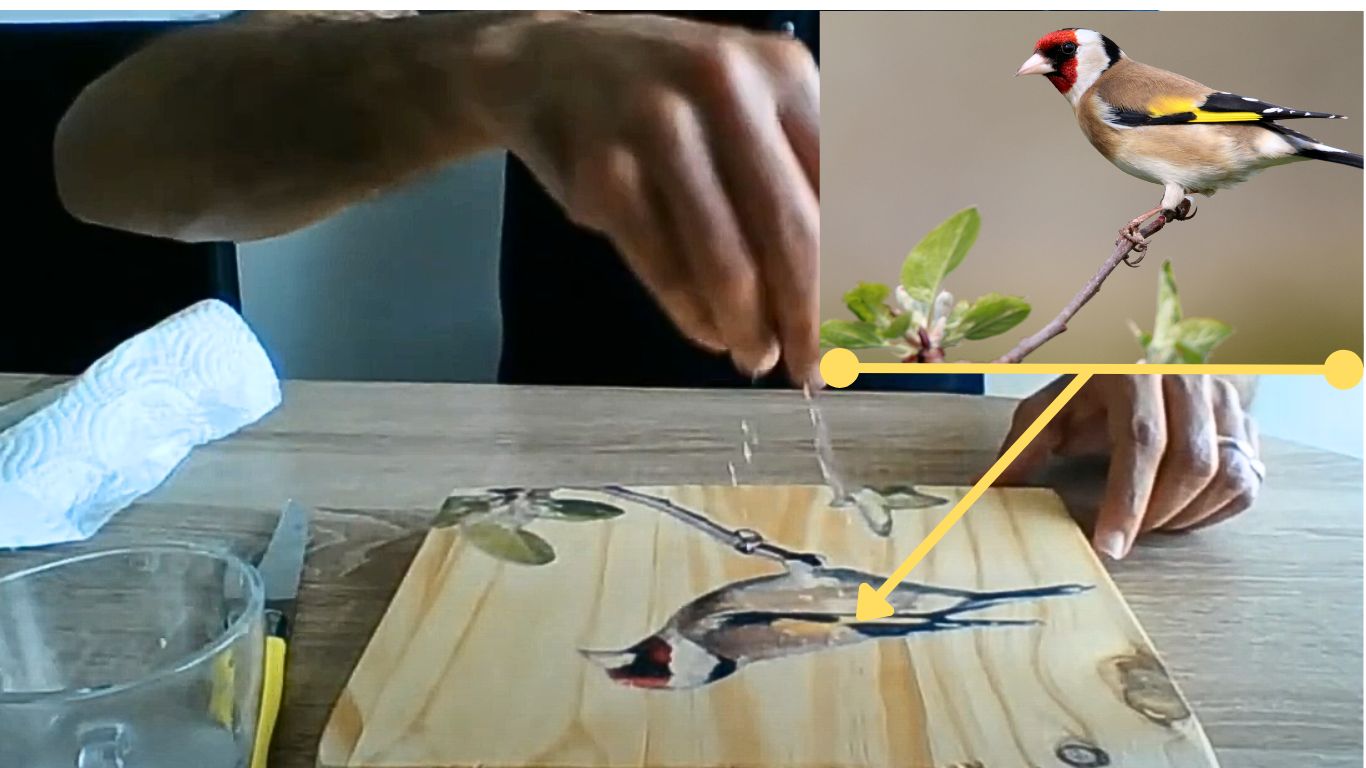
5. Remove the Paper Backing
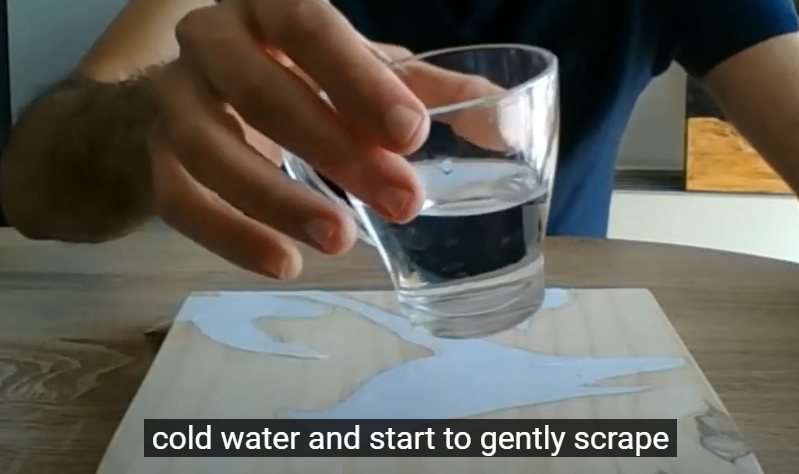
Once fully dry, it’s time to remove the paper support from the image. Start by lightly dampening the surface with a damp cloth.
Gently scrape with your fingers or a plastic spatula to gradually remove the paper. Take your time and continue to moisten the surface as you go.
👉 Avoid pressing too hard to prevent damaging the transferred image details.
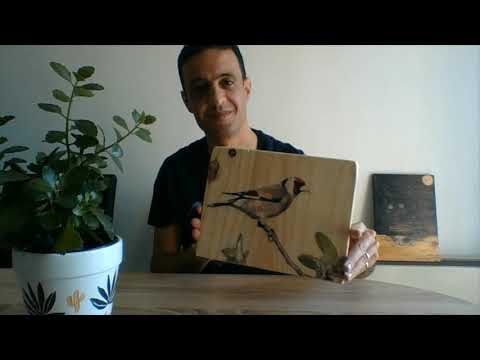
6. Protect and Finalize Your Artwork
With the paper backing removed, your goldfinch image is now transferred onto the wood. To protect and enhance the appearance, it’s time to apply multiple coats of varnish.
Expert Tip: Choose a clear varnish or acrylic sealer, in either a matte or glossy finish, depending on your preference. The varnish will seal and durably protect your creation.
Start by lightly sanding the surface with a medium-grit sandpaper (150-180) to smooth out any irregularities. Carefully wipe away any dust.
Apply 2-3 thin, even coats of varnish, allowing it to fully dry between each application. Lightly sand with a finer grit paper (180-220) before adding the final coat.
👉 Use slow, consistent brush strokes to achieve a smooth, uniform finish.
And there you have it! Your stunning wood decor piece featuring your beloved goldfinch is now ready to proudly display in your home.
Ideas for Use and Inspiration
The possibilities are endless for showcasing your goldfinch wood transfer:
- Create a series of multiple wood panels for a triptych or decorative wall display
- Use a larger panel to make a coffee table, headboard, or unique work surface
- Gift your personalized creation for a special occasion
- Incorporate your wood transfer into your home decor by placing it on a piece of furniture, shelf, or console
Feel free to let your creativity shine and bring your favorite bird photos to life in a truly unique way. The authentic, handcrafted look of the wood will elevate your images in a remarkable fashion.
FAQ – Frequently Asked Questions
How do I choose the best wood for the image transfer?
Opt for a smooth, thin wood panel, typically between 3-5 mm thick. Pine, plywood, or MDF are good options. Avoid woods that are too rough or porous, as they may compromise the quality of the transfer.
Can I use any laser-printed image?
No, only images printed from a laser printer are suitable for this transfer technique. Inkjet printer ink will not transfer properly onto the wood.
How many coats of varnish should I apply?
We recommend applying 2-3 thin, even coats of a clear varnish or acrylic sealer. This will help seal and protect your image transfer in the long run.
Can I use this process to transfer other types of images?
Absolutely! You can transfer all kinds of images onto wood, from landscape photos to decorative patterns. Let your creativity run wild!
How long will my wood image transfer last?
Thanks to the protective varnish coating, your wood image transfer will become a durable decoration that will withstand the test of time. With proper care, your creation can beautify your home for many years.
Can I reuse wood scraps to make multiple transfers?
Yes, you can certainly reuse small wood offcuts to create multiple image transfers. It’s a great way to be creative while also being resourceful.
Do I need to sand the wood before applying the glue?
Extensive sanding of the wood is not necessary before the transfer. A light sanding with a fine grit (180-220) is sufficient to smooth the surface and promote better glue adhesion.
Should I soak the paper in water before the transfer?
No, we advise against soaking the paper. This could potentially damage or distort the laser-printed image. Lightly dampening the paper during the removal stage is all that’s needed.
Feel free to ask us any other questions you may have! We’ll be happy to provide further guidance on your wood image transfer project.
Conclusion: An Original and Durable Decoration
Transferring a laser-printed image onto a wood surface is a simple and quick technique to create a truly unique wall or tabletop decoration. With your transferred goldfinch photo, you’ll obtain an authentic, personalized piece that will become the focal point of your interior.
Don’t hesitate to share your creations and projects inspired by this tutorial! We’d love to see the results of your DIY endeavors.


