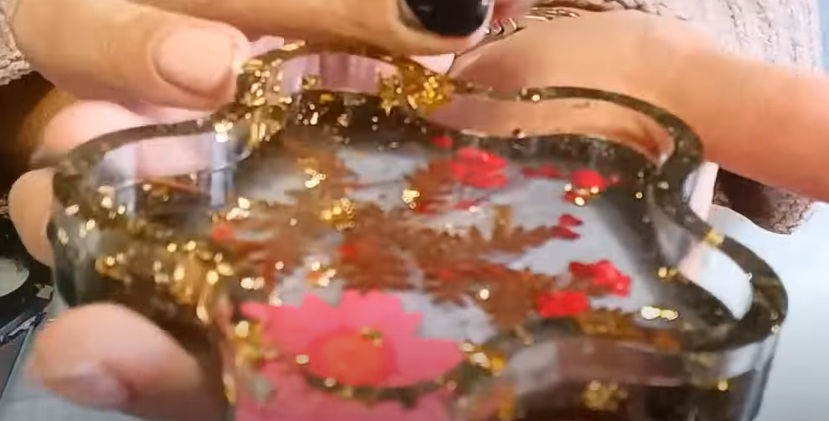
Discover how to create unique resin coasters in the shape of flowers with this trendy technique. Follow the simple steps to mix the epoxy resin, add decorative elements like dried flowers and gold leaves, and achieve a stunning black and white result. These handcrafted resin coasters will add a touch of sophistication to your home decor.
Why Choose Resin Coasters?
Resin coasters are an excellent craft project for beginners and experts alike. With just a few basic supplies and a bit of creativity, you can create elegant pieces that will brighten up your interior decor. Epoxy resin is easy to work with and offers many possibilities for customization.
Advantages of Resin Coasters
- Durable and stain-resistant
- Unique and customizable design
- Can be made at a low cost
- Fun and creative project
Resin Coaster Kit
Resin Coaster Kit by ArtResin
- Includes ArtResin liquid resin, coaster molds, coasters and instructions
- Easy to use for beginners
- Comes in several color options
Resin Coaster Silicone Mold Kit by Dr. Craft
- 4 different fun coaster mold shapes
- Made of flexible silicone for easy demolding
- Comes with glitter, dried flowers and more decorative items
Resin Coaster Making Kit by Shuny
- Epoxy resin, glitters, silicone molds, stir sticks included
- Enough materials for 15-20 coasters
- Great option for beginners and kids
Resin Coaster Maker Kit by NewAmy
- Includes 4 square coaster molds, resin, glitters, shells and more
- Easy to follow instructions
- Good variety of decorative elements
AISHOP Resin Epoxy Coaster Molds Kit
- 6 round coaster silicone molds in the kit
- Resin, glitters, shells, dried flowers included
- Several color options available
👉 No matter which kit you choose, look for ones that include the basic epoxy resin, molds, and fun decorative extras like glitters, dried flowers, shells etc. Having all the supplies in one kit makes the coaster making process easy and enjoyable.
_ Silicone Coaster Molds
- Flexible silicone molds are great for easy demolding
- Available in many shapes like circles, squares, geometric patterns
- Some silicone molds have multiple coaster shapes in one mold
- Silicone is heat resistant and reusable
Plastic Coaster Molds
- Rigid plastic molds good for basic shapes like circles and squares
- Very inexpensive option, some come in multi-packs
- May need to spray with release agent for easy demolding
- Disposable, can’t withstand high temperatures
Ceramic Coaster Molds
- Heavy duty ceramic gives a nice smooth finish
- Great for intricate designs that need clean details
- Requires good release agent or will stick
- More expensive but extremely durable
Handmade Coaster Molds
- Get creative with bezel cups, jar lids, muffin tins
- Allow you to make very custom shapes and sizes
- May need a sealant like petroleum jelly to prevent sticking
- Affordable way to reuse household items
👉 No matter which type of mold you choose, look for ones with good reviews on ease of use and demolding. Having the right sized molds for the coaster thickness you want is also important. With so many options, you can easily find molds to fit your resin coaster project vision.
Steps to Make Your Flower-Shaped Coasters
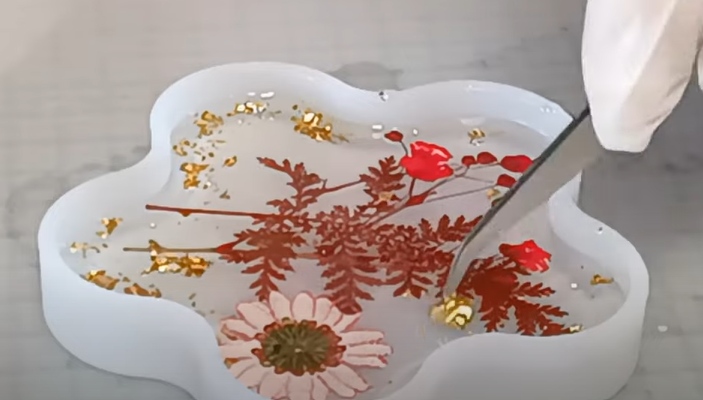
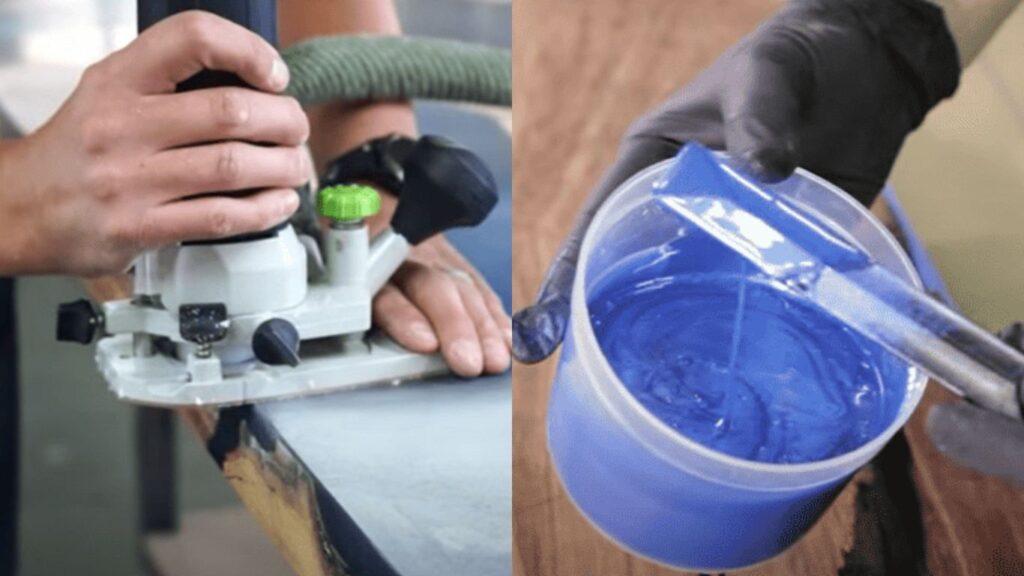
The process begins by carefully mixing the epoxy resin according to the manufacturer’s instructions. Be sure to work in a well-ventilated area and wear gloves. Once well mixed, you can add your personal touch.
Add Decorative Elements
- Incorporate dried flowers for a natural, bohemian look
- Inlay gold leaves for a touch of elegance
- The contrast between black and white gives a chic and trendy aesthetic
For a perfect finish, pour the mixture into flower-shaped molds and let it cure for 24 to 48 hours. Once unmolded, your artistic resin coasters are ready to be admired!
Here are some step-by-step instructions for making resin coasters:
- Prepare your work area by covering it with parchment paper. Good ventilation is important when working with resin.
- Read the instructions for your specific resin and mix the resin and hardener together at the recommended ratio. Stir slowly and thoroughly to avoid air bubbles.
- For opaque coasters, you can tint the resin by adding alcohol inks, acrylic paints, or resin dyes. Combine colors as desired.
- To create designs or patterns, pour a layer into each coaster mold cavity. Let partially cure until the resin reaches a gel-like state.
- Add decorative elements like dried flowers, glitters, shredded paper, etc. by gently pressing them into the gelled resin layer.
- For a clear domed top, do a second pour over the decorative elements to fill the molds completely. Use a torch or heat gun to pop any air bubbles.
- Allow the resin to fully cure according to the manufacturer’s guidelines, usually 24-48 hours.
- Once cured, gently flex the silicone mold to demold the coasters. Use a plastic putty knife if needed.
- Optionally, finish the edges with sandpaper or beeswax for a smooth, polished look.
- For added protection, spray or brush the finished coasters with a water-based polyurethane sealer.
With a little practice, making beautiful handmade resin coasters is easy! Experiment with different colors, textures and embeddments. 🙂
Create Resin Flower Coasters (Video)
What materials are used to create the flower coasters in the video?
The video shows the creator using resin, dried flowers, gold leaves, and metallic powders to make the flower-shaped coasters.
What is the creator’s recommended mixing ratio for the resin used in this project?
The creator mentions using a mixing ratio of 1 gram of hardener to 60 grams of resin for the transparent Pro resin brand they are using.
Why does the creator prefer the dried flowers from Scrabble over other sources?
The creator states that they prefer the Scrabble dried flowers because they are flat, making them much easier to embed in the resin without floating up.
How does the creator finish the coaster design?
The creator adds a black border around the edge of the coaster, then fills the center with a white and black swirled design, accenting it with gold glitter.
Is epoxy resin safe to work with?
Yes, epoxy resin is safe when used as directed and in a well-ventilated area. Always wear gloves and avoid skin contact.
How long does it take for the resin to fully cure?
Curing times can vary, but most epoxy resins fully cure within 24-48 hours
Ideas and Inspiration
Whether you’re looking for a fun project to do alone or to share with family and friends, these resin coasters will bring a touch of creativity to your home. Experiment with different colors, patterns, and shapes to create unique designs that will harmonize with your decor.
Don’t be afraid to let your imagination run wild! You can even customize your coasters with photos or messages to create memorable gifts.
Here are some fun and creative resin coaster ideas to try out:
Nature-Inspired Coasters
- Press pressed flowers, leaves, or ferns into the resin for a beautiful natural look.
- Embed seashells, sand, or beach glass for a coastal vibe.
- Use wood slices or bark pieces as bases for a rustic feel.
Alcohol Ink Coasters
- Drop and swirl different colored alcohol inks into the resin for marbled effects.
- Use a straw to blow the inks into fun patterns and designs.
- Add metallic accents with mica powders or gilding sheets.
Photo Coasters
- Seal your favorite photos, illustrations, or memento items into the resin.
- Great for making personalized gifts or commemorating special occasions.
- Use inkjet printouts or thin paper ephemera pieces.
Geometric Coasters
- Create striped, chevron, or plaid patterns using colored resin or alcohol inks.
- Embed glitters or metallic leaf pieces in geometric shapes.
- Use stencils or painters tape to block off designs.
Holographic/Prism Coasters
- Mix holographic glitters or prism films into clear resin for rainbow effects.
- Use pigment powders or mica powders to add shifting colors.
- Top with clear resin for amazing 3D holographic looks.
There are endless possibilities when working with resin! Get creative with colors, textures, and materials for totally unique handmade coaster designs.
So, don’t wait any longer to try this amazing resin crafting tutorial! With a little patience and creativity, you’ll create elegant coasters that you’ll be proud of.

